- Home »
- FAQ
MCB Performance FAQ
- FAQ's
- Privacy Policy
- Communications
- Brochure Mailing List
- Communications to Serve You
- Fraud Protection and Compliance with Law
- Service Providers
- Special Events
- Business Transfers
- Cookies, IP Addresses, Pixel Tags and Tracking Technology
- Use of Aggregate Information
- Links
- Security
- Notification of Policy Changes
- Updating Personal Information
- Contacting Us
- Shipping & Returns
- Warranty
- Cast vs. Forged pistons
- Setting quench / squish
- Communications
- Brochure Mailing List
- Communications to Serve You
- Fraud Protection and Compliance with Law
- Service Providers
- Special Events
- Business Transfers
- Cookies, IP Addresses, Pixel Tags and Tracking Technology
- Use of Aggregate Information
- Links
- Security
- Notification of Policy Changes
- Updating Personal Information
- Contacting Us
FAQ's
Q: How do I accomplish a proper 2-STROKE Break-In?
Proper break in of a 2-Stroke Engine. This a VERY common question and can be summed up with one sentence: Increased Load over Decreasing Time. What that implies is the engine needs LOAD for proper marrying & seating of components and the load should be increased over a reduced schedule.
How this would normally work:
1 - ALWAYS start with 100% NEW fuel and a PROPERLY LEAK TESTED engine per factory guidelines. Carb(s) / Injectors MUST be clean, filters replaced and hopefully if there was a failure you have isolated and corrected the root cause before simply replacing parts.
2 - Heat cycle #1 - Start the engine and bring it to just UNDER operating temp and then let it cool COMPLETELY (i.e. overnight) Ensure it is oiling! Revving the engine BRIEFLY and not over 1/3 throttle once or twice is fine.
3 - Heat cycle #2 - Check for leaks. Pull spark plugs and verify relatively dry cylinders. Start engine and bring to full operating temp and note cooling system burping and top off as needed. Let engine cool COMPLETELY again.
4 - First ride should be SHORT (15-20 min). This is where you will be putting the first load to the engine by applying short / brief bursts of throttle up to 1/2 throttle and slowly rolling into and off the throttle varying the LOAD. Again let cool completely and check bores/plugs , cooling system, and ensure oiling. After this you may ride as much as you wish but NO LONG WOT for the first tank and varying throttle and loads for the next tank full.
Snowmobile specific info:
1 - With most later Ski Doo Etec's you MUST have the ECU put in break-in mode (anyone with a professional BUDS interface can do this). DO NOT add premix to any Direct Injection (ETEC) engine.
2 - Carbureted engines CAN use premix during break-in however no more than 100-1 and the oil MUST be premix-compatible.
3 - Any cable actuated oil pump (Earlier Cat, Polaris, Skidoo, etc) you may find it beneficial to shorten that cable adjustment to allow more initial oiling just remember that it does NOTHING additional at WOT. On the Polaris 800's this adjustment can be left for the life of the engine as Polaris ran these engine VERY oil-lean.
4 - Its ALWAYS a good idea to measure/monitor and CALCULATE YOUR OIL RATIO being used! Fill both tanks then after usage measure the top off amount of each (gallons to ounces) and calculate. This will give you piece of mind that all components are operating properly
Privacy Policy
Q: Communications
If you select during the order process or at other times when you submit personally identifiable information, the information you provide may be used by MCB Performance to create and deliver to you our newsletters, surveys or other communications containing product information. If you prefer not to receive such Communications, please do not select the ‘Please inform me option’. If you do select this option and later decide that you would no longer like to receive these communications, please use the features made available to you.
Q: Brochure Mailing List
If you have requested a MCB Performance brochure, all information is kept completely confidential and is not shared with any third parties. We may, on occasion, send you an updated catalog or brochure. If you do not wish to receive any mail from MCB Performance, please contact us via email at . Include your name and mailing address and email address. You will be removed from any future mailings.
Q: Communications to Serve You
If you have elected to provide us with your contact information, e.g., by registering at the Site, emailing our Customer Service department or placing an order, we may provide you with service related announcements concerning the Site or contact you regarding your customer service requests or your order. For example, all registered users will receive an email to confirm their order. These types of communications are necessary to serve you, respond to your concerns and to provide the high level of customer service that MCB Performance offers its customers.
Disclosure of Personally Identifiable Information
We will never provide your personally identifiable information to third parties for their use in marketing their products or services to you without your consent. MCB Performance takes great pride in having you as a customer and we will ensure your privacy as a customer. MCB Performance does not sell or exchange names or any other information about our customers with third parties.
Q: Fraud Protection and Compliance with Law
We may disclose any information, including personally identifiable information, we deem necessary, in our sole discretion, to comply with any applicable law, regulation, legal process or governmental request. We may also exchange information, including personally identifiable information, with other companies and organizations for credit fraud protection and risk reduction.
Q: Service Providers
We may retain other companies and individuals to perform functions consistent with our Privacy Policy on our behalf. Examples include customer support specialists, web hosting companies, fulfillment companies (e.g., companies that fill product orders or coordinate mailings), data analysis firms and email service providers. Such third parties may be provided with access to personally identifiable information needed to perform their functions, but may not use such information for any other purpose.
Q: Special Events
If you elect to participate in any promotions, sweepstakes, surveys, questionnaires or other events during your visit to our Site, the rules or terms and conditions for those events may indicate that your personally identifiable information will be shared with third parties. By choosing to participate and submitting your personally identifiable information with respect to such events, you consent to disclosure of your personally identifiable information to such third parties.
Q: Business Transfers
As we continue to develop our business, we might sell certain of our assets. In such transactions, user information, including personally identifiable information, generally is one of the transferred business assets, and by submitting your personal information on the Site you agree that your data may be transferred to such parties in these circumstances.
Q: Cookies, IP Addresses, Pixel Tags and Tracking Technology
We may place a "cookie" on your computer's hard drive so we can recognize you as a return user and personalize your experience. A cookie is a piece of data that enables us to track and target your preferences. The cookie will be stored on your computer's hard drive until you remove it. We may also use temporary or "session" cookies to help you shop. These cookies will expire when you place an order. You can have your browser notify you of, or automatically reject, cookies. If you reject our cookies, you may still use the Site, but you may be limited in the use of some of the features. In addition, we may use IP addresses to analyze trends, administer the Site, track traffic patterns, and gather demographic information for aggregate use, as well as in combination with your personally identifiable information for credit fraud protection and risk reduction.
Similarly, when you visit this Site or view one of our emails, we may use pixel tags (also called "clear" gifs), tracking links and/or similar technology to note some of the pages you visit on our Site and personalize your experience. We may also use pixel tags to determine what types of email your browser supports. We may use the information collected through pixel tags, tracking links and similar technology in combination with your personally identifiable information.
mcbperformance.com does recognize your ISP (internet service provider), however, we cannot identify you as an individual. If you make an on-line purchase we do collect information (such as sales statistics and traffic patterns) to help improve your shopping experience. We keep all information confidential.
Q: Use of Aggregate Information
We may use the information you provide in aggregate (non-personally identifiable) form for internal business purposes, such as generating statistics and developing marketing plans. We may collect, store or accumulate certain non-personally identifiable information concerning your use of the Site, such as information regarding which of our pages are most popular. We may share or transfer non-personally identifiable information with or to our affiliates, licensees and partners.
Q: Links
This Privacy Policy applies only to the information collected on this Site. Our Site may contain links to or from other websites and you should be aware that we are not responsible for the privacy practices of other websites. We encourage you to read the privacy policies of other websites linked to the Site.
Q: Security
MCB Performance seeks to protect the security of your personal information both online and offline. All credit card transactions are secure. Every on-line order is encrypted and sent through a secure server, using SSL technology to prevent information from being intercepted.
Confidential information such as your credit card number will be used only to fulfill your order. To protect your privacy, we will ask you to enter your credit card number and expiration date each time you place an order with us. This way, even if someone else accesses the account information stored on your computer, they won't be able to use your credit card.
E-mail is not encrypted and is not a secure means to transmit credit card numbers. We will only display the last 4 digits of your credit card number on your account.
Q: Notification of Policy Changes
MCB Performance reserves the right to revise this Privacy Policy in the future by posting changes at this location and we may make changes at any time without notification.
Q: Updating Personal Information
If you are a registered member at MCB Performance, you can change your personal information at any time by updating your information at check-out.
Q: Contacting Us
We welcome your comments and questions about privacy. Please send email to mcb@mcbperformance.com.
We are confident that your visit to MCB Performance is secure and safe. However, you may choose to call us directly to place your order over the telephone. Please call Customer Service toll free at 810-395-7162 Hours 9-4.
Shipping & Returns
Q: Customer Returns
If for any reason you are not happy with your purchase after receiving your item, you may return the item(s) within 7 days of receiving your order or a refund of your costs as long as the merchandise is in fully resalable condition (no damage, no stains, no wear and tear)
All returns must have its original packaging with freight prepaid and insured. All returns will be assessed the industry standard 15 % restocking fee. Returns must be made within 15 days of "Return Authorization" date.
Any returns must be noted with a full description on the front of the manifest or bill of lading in order to be recognized as valid. Prior to any returns, customer must contact MCB Performance at 810-395-7162.
Q: Delivery Times
"In-Stock" items usually process in 24-48 hrs and shipping times vary based on your choice of service and location.
Occasionally, items shown to be in stock or available get pre-sold, in this case, you will be sent a email notification that your item is on backorder. You have the option to continue to wait for that item, cancel your order for a full refund, or select a different item to order.
If you are ordering an Item that has a core required BEFORE shipping the order you may be notified of this need first.
Q: Disclaimer of Liability
To the extent permitted by law, neither MCB Performance nor any of its employees, related partners or their respective officers will be liable in any way for any loss, damage, cost or expense suffered or incurred by you or claims made by you because of your use of this site, unavailability of this site or in connection with any products, services or information advertised, offered or supplied through this site. MCB Performance maintains the exclusive right to cancel or refuse any order without limitation. Including price omission, incorrect price, typographical errors, suspicion of fraud, and delivery area restrictions
DUE TO THE INHERENT USE OF HIGH-PERFORMANCE PRODUCTS, MCB PRODUCTS AND EACH PART THEREOF, ARE SOLD “AS IS” AND WITH ALL FAULTS, TO THE FULLEST EXTENT ALLOWED BY LAW, MCB MAKES NO WRITTEN, ORAL, EXPRESSED, OR IMPLIED STATEMENT OF WARRANTY OR GUARANTEE ON ANY PRODUCT OR PART SOLD. MCB WILL NOT BE LIABLE FOR ANY DIRECT, INDIRECT, INCIDENTAL, CONSEQUENTIAL, OR SPECIAL DAMAGES, INCLUDING, BUT NOT LIMITED TO DAMAGE, INJURY, LOSS OF LIFE, LOSS OF PROPERTY OR EQUIPMENT, LOSS OF PROFITS OR REVENUE, OR CLAIMS FROM ANY INDIVIDUAL OR ENTITY ARISING FROM THE USE OF ANY MCB PRODUCT.
Warranty
Q: What is the Warranty on your Parts / Kits
Setting quench / squish
Q: how to set quench
The following procedure is mandatory when rebuilding most any modern 2-stroke with a Torodial combustion chamber (i.e. Rotax, BRP, Skidoo, Suzuki, etc). This outline is designed for the do it yourselfer with limited tools although it does require a simple dial indicator (in .001 maximum) as well as a deck bridge.
Look closely at the photos and you will see that these simple measurements are easy and VERY important to the proper operation and longevity of your build.
This also the SAME procedure if you prefer wish to also gauge the OEM piston projection dimension.
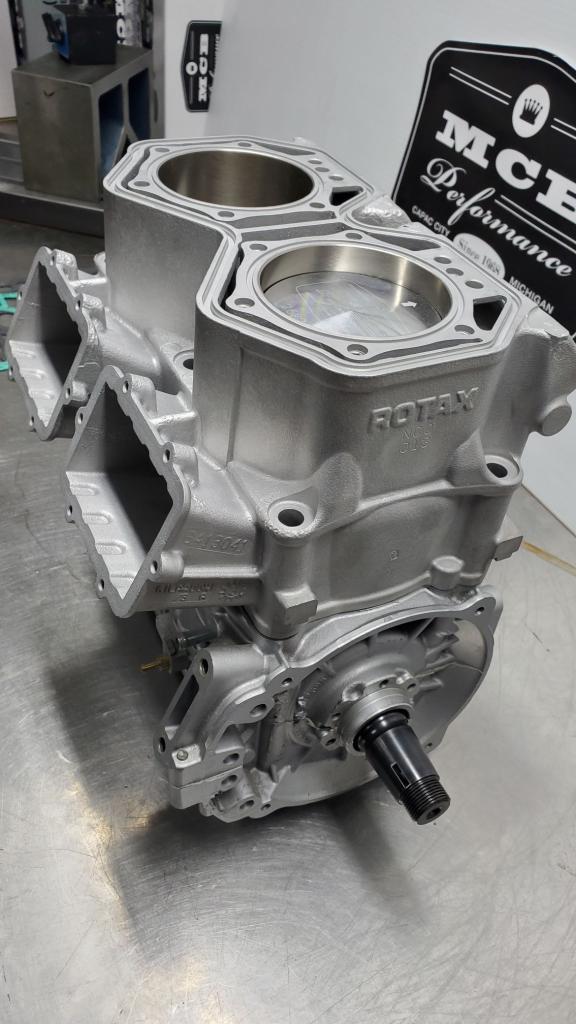
1 - The parts needed shown below:
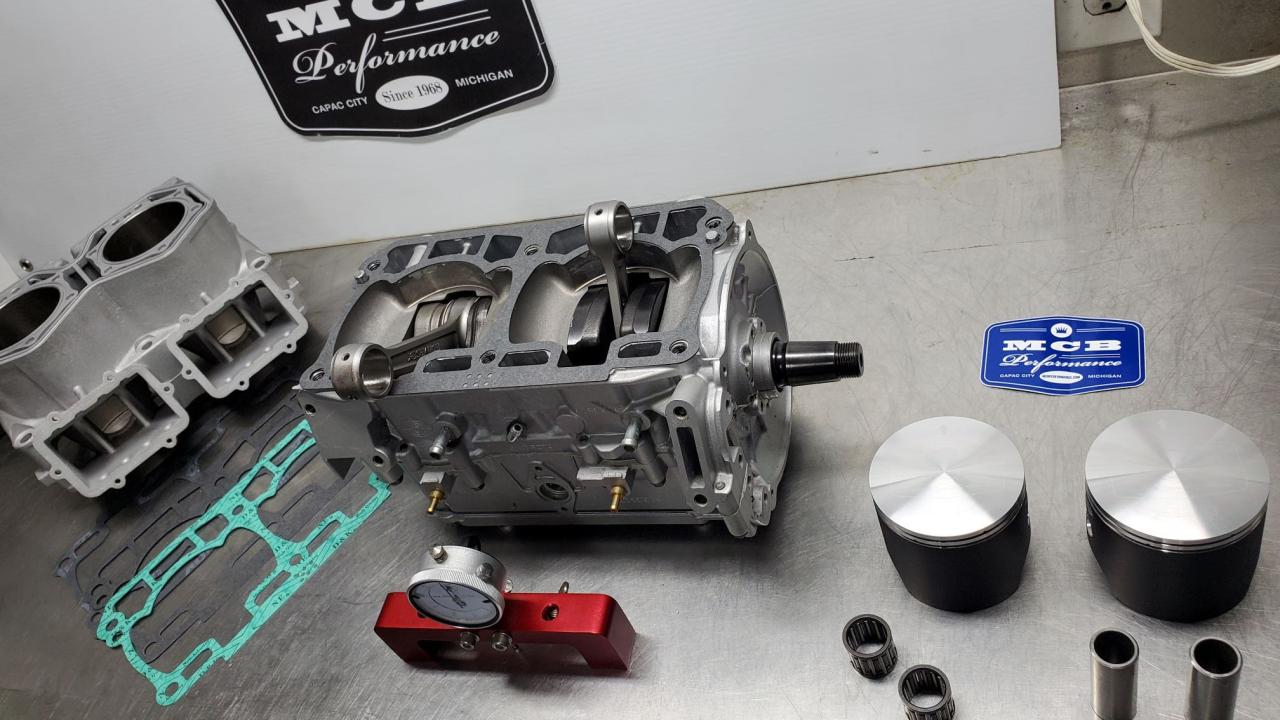
2 - Dry install any base gasket in the kit and NOTE THE THICKNESS. You can try the original thickness you removed but VERY often it will need to be changed for many reasons.
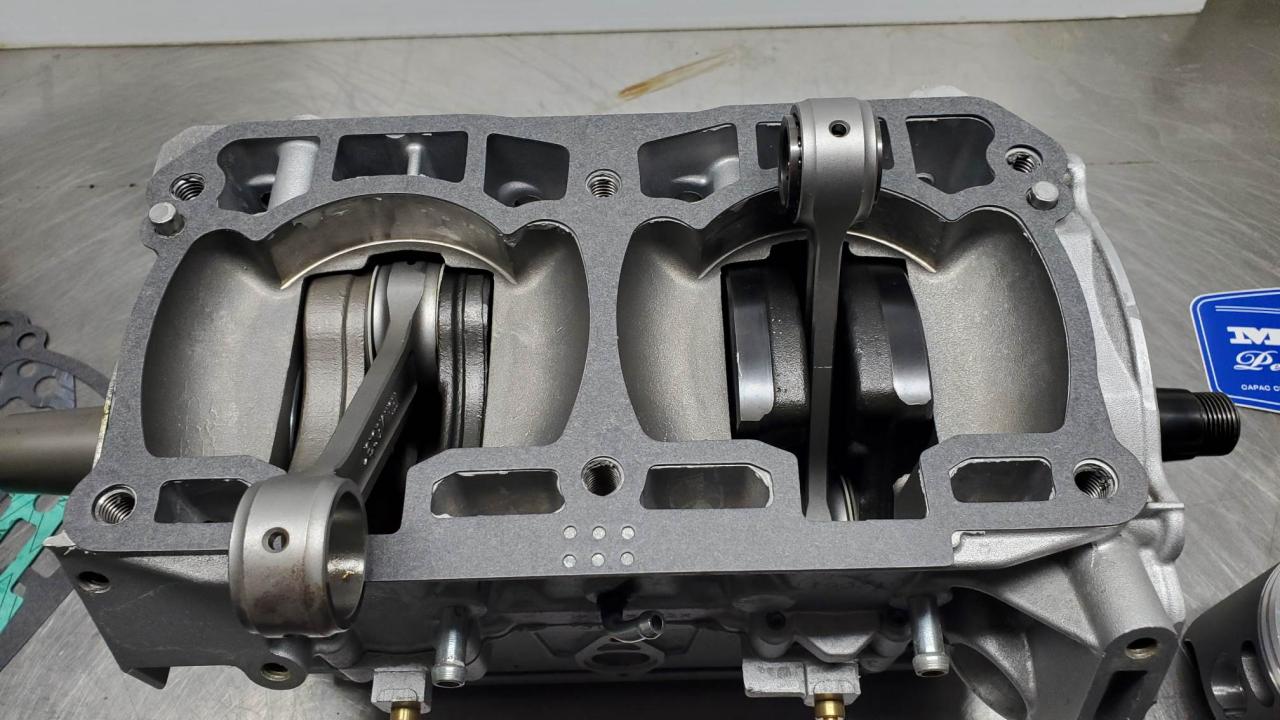
3 - Install the pistons WITHOUT RINGS, in the proper orientation WITH pin bearings (clips are not necessary at this point)
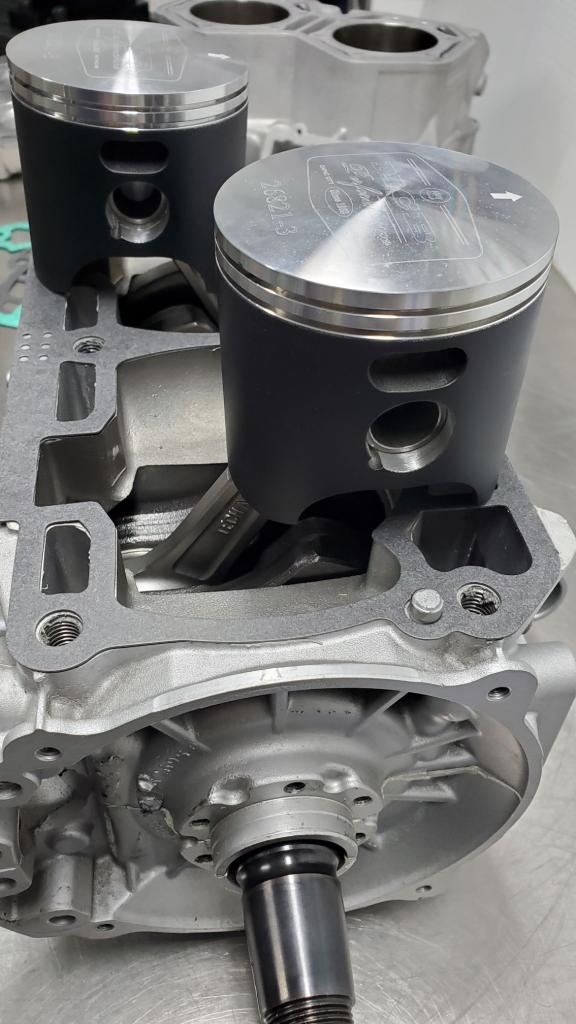
4 - Lightly lube the piston skirts and install the (CLEAN) cylinders and lightly tighten the cylinder bolts (not shown in pic).
Zero your indicator to the top of the cylinder casting
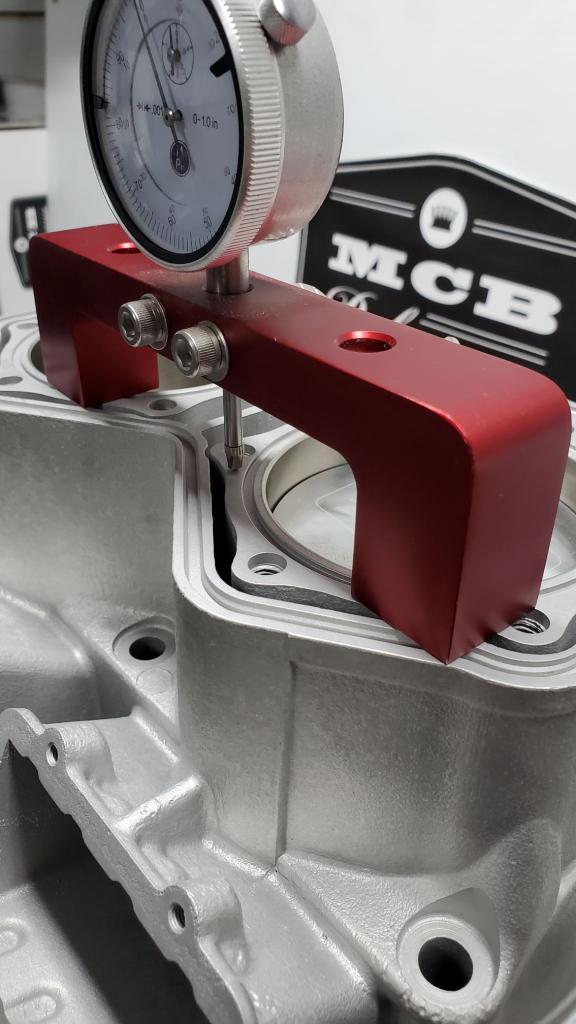
Showing the zeroed gauge again...
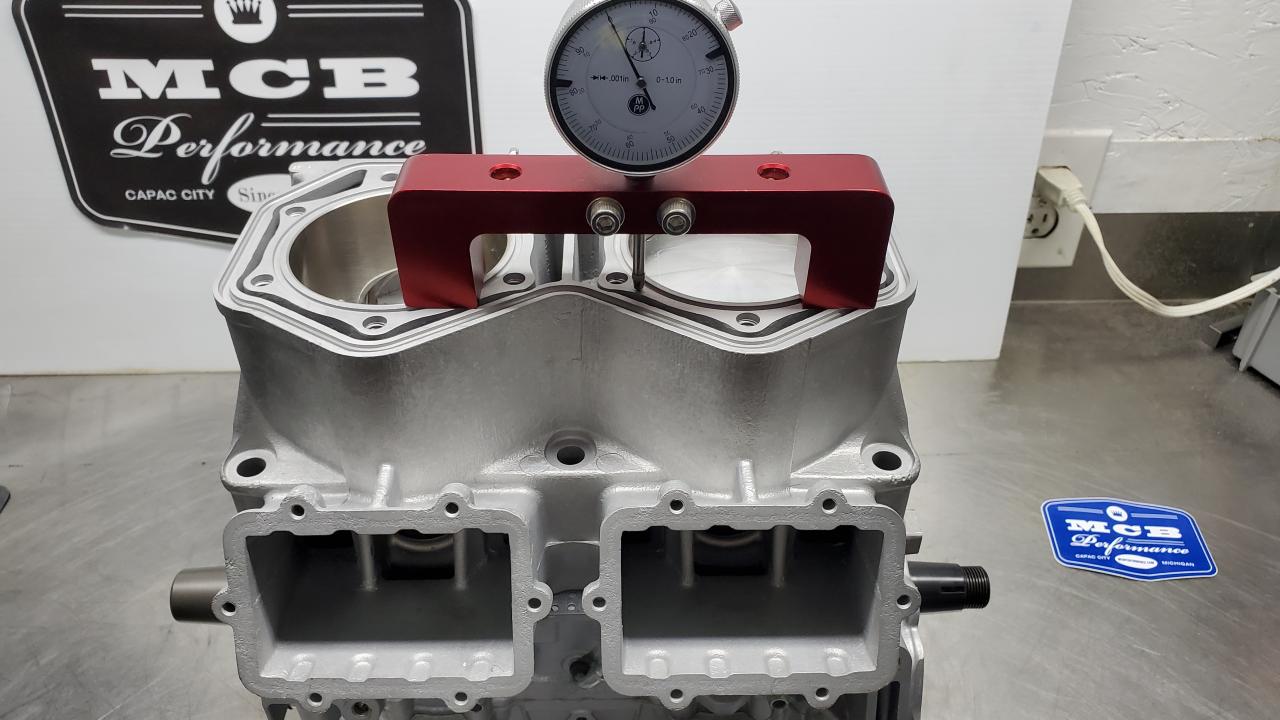
Bring the piston to its highest possible level and note the reading, do this a few times to verify you have established top dead center. Note: this is also how OEM piston projection dimension is gauged.
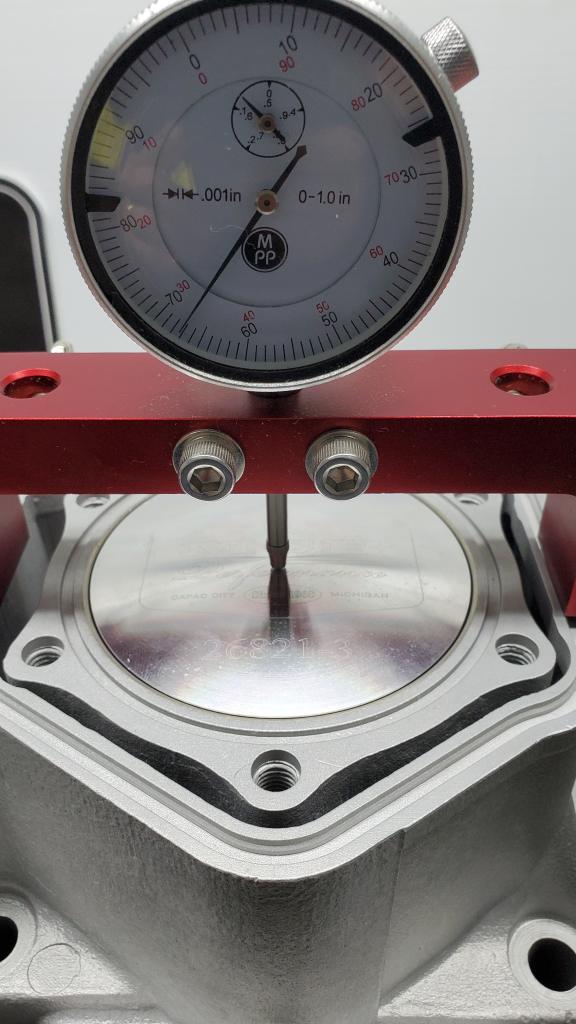
Once the gauge is zeroed to the cylinder, position it now right next to the edge of the bore IN LINE with the piston pin and reverify its zeroed.
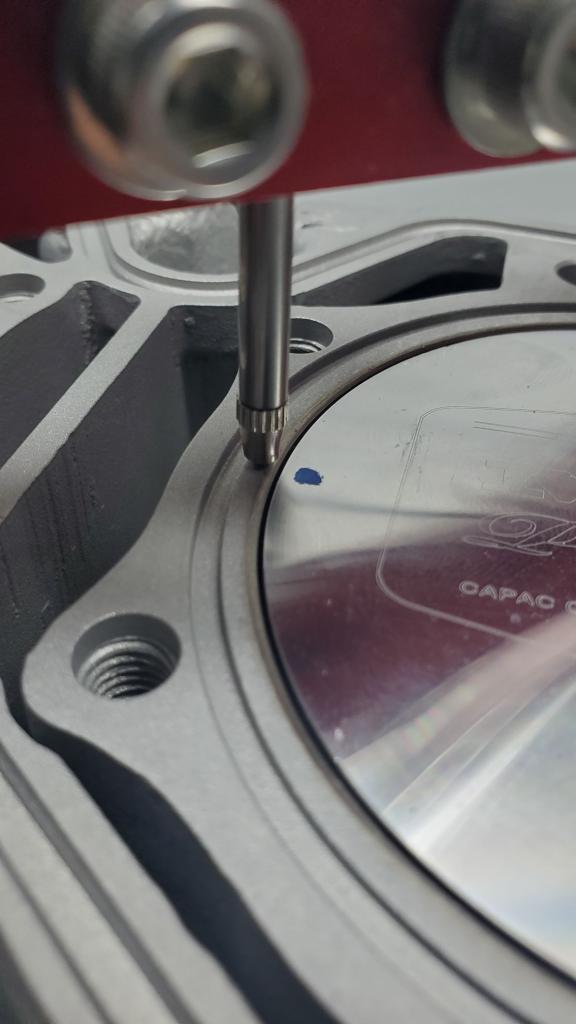
With the piston at TOP DEAD CENTER walk the gauge off the edge and let it rest on the very outmost edge of the piston but not dragging on the cylinder wall. This dimension is then recorded. (note this gauge is reading .011 down the hole)
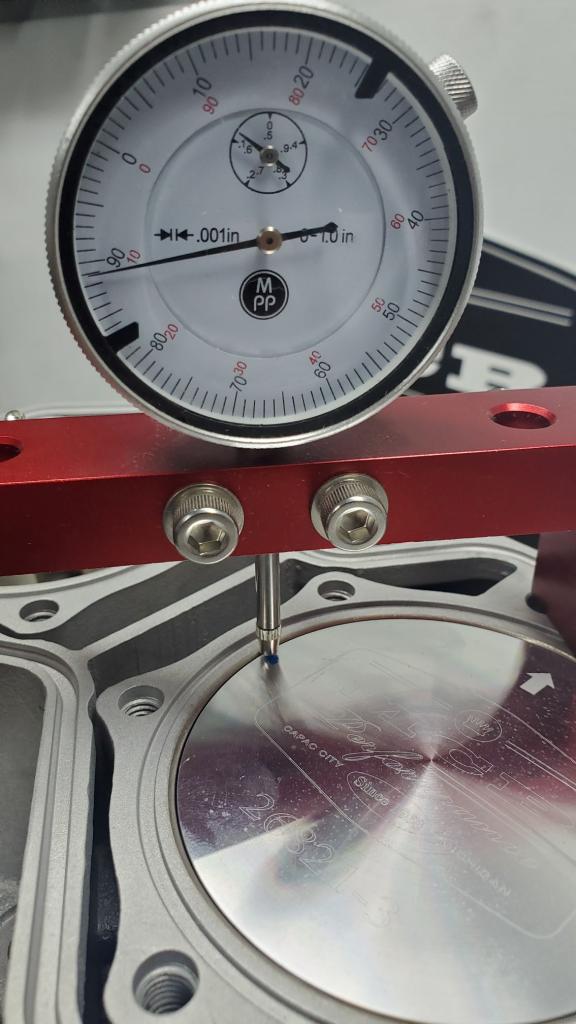
Repeat this measurement on the other side of the piston again IN LINE with the piston pin. (note the gauge also reading the same .011 as the other side)
If the numbers vary, simply average the two numbers
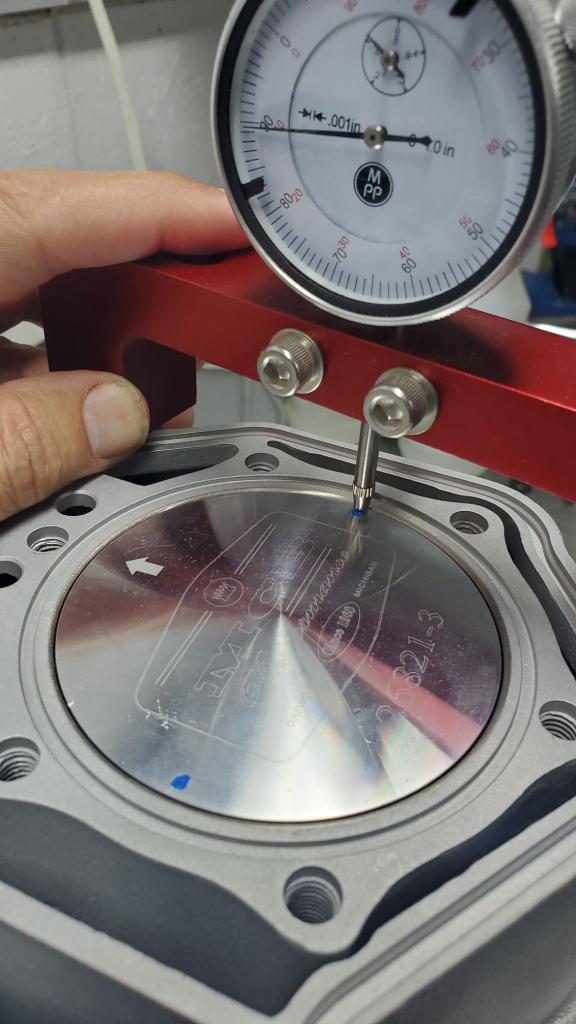
Now we can do the same for the cylinder HEAD. We want to determine the depth of the quench band cut in to the head. Some engine do NOT have a noticeable cut however the quench/squish band may taper rapidly away from the bore edge.
As shown, once again zero your gauge to the sealing surface of the head
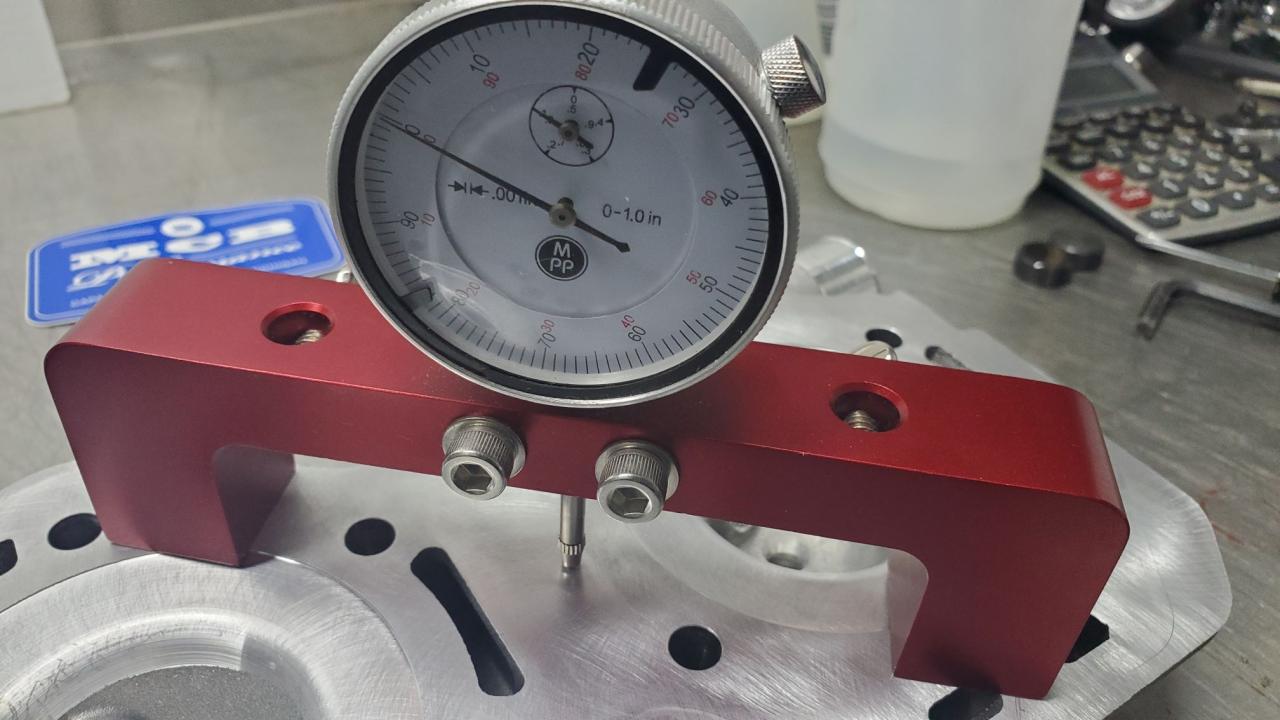
The blue dot below showing where we want to measure the step in the head
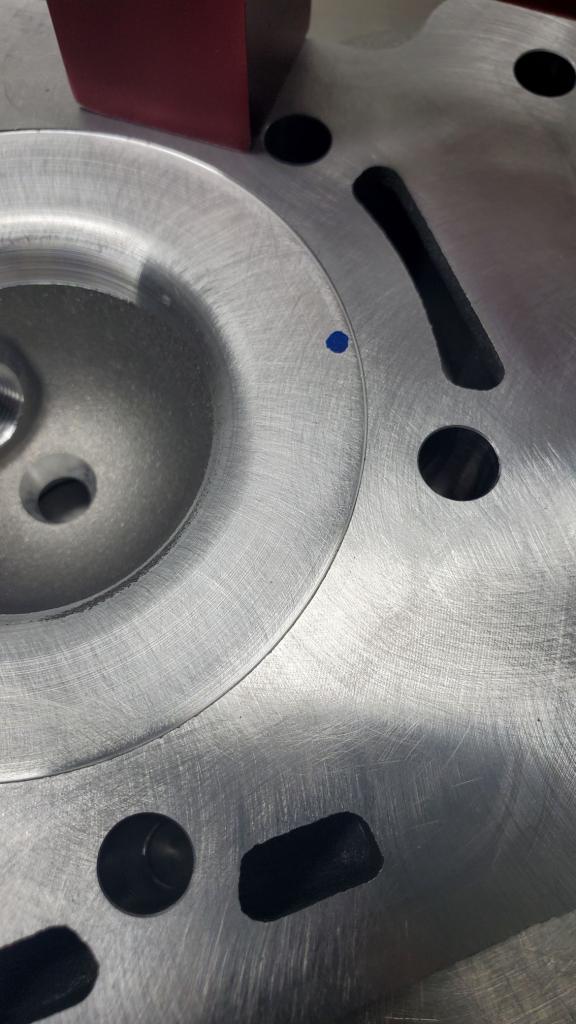
Again walk the gauge off the edge of the head right at the bore wall interface. Read and record this dimension. (Note the gauge here is reading .025)
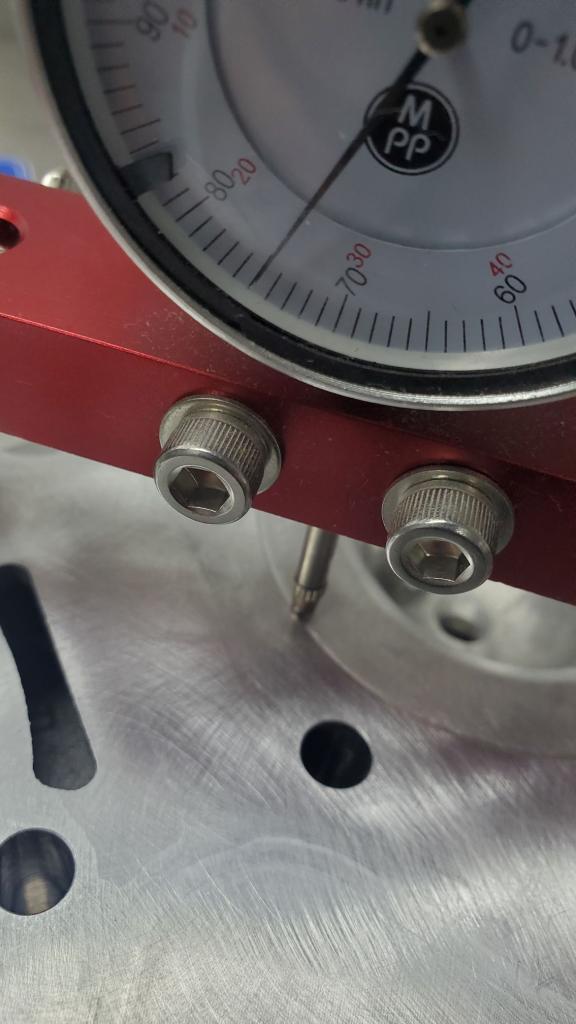
Now we simply add the piston clearance dimension the head step dimension and you have an exact measurement of quench/squish. In this example we have the piston down the hole .011 plus the head step at .025 for a total of .036.
Now with this total measurement (.036), compare it to the required clearance guidelines outlined in our MCB Top-End instructions or the factory service manual.
To adjust this dimension you can simply increase or decrease quech by using a thicker or thinner base gasket. This is why MCB includes several of the critical gasket sizes in our complete kits.
Some key additional points:
- The material used in the base gasket can have an effect on how much it yields once it is fully torqued. For instance a composite gasket will often show a tighter quench once fully torqued vs lightly tightening the cylinder bolts for just checking.
- In general if the engine is tuned and running properly and has FRESH good quality fuel you are always safer to go TIGHTER rather than thinking that you can reduce detonation with a looser quench dimension. When quench is too loose the MSV (velocity of gasses pushed in to the combustion chamber) becomes highly detonation PRONE as fuel can puddle and these is less heat transfer.
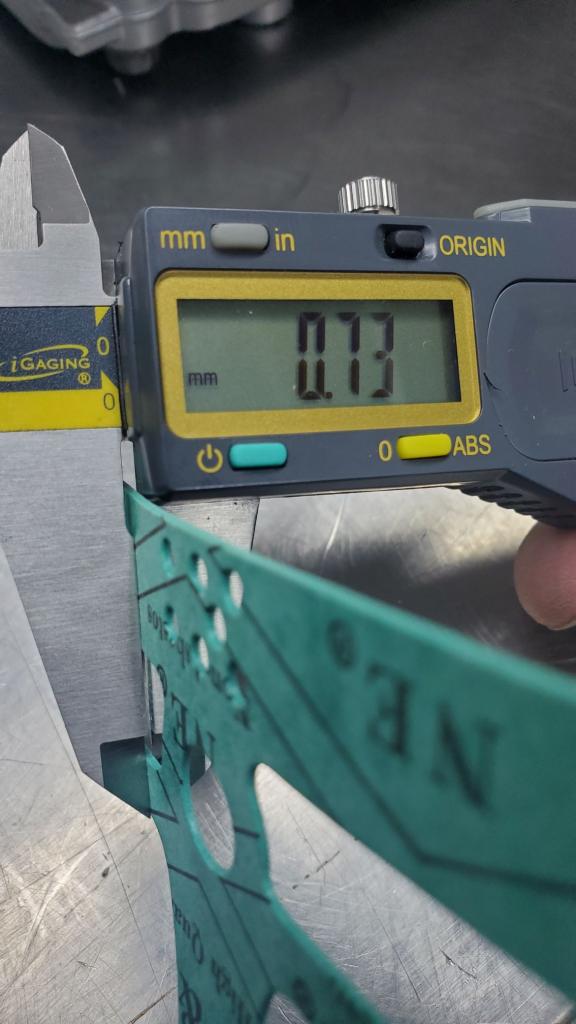
Note the gasket below is a "6 hole" gasket which should measure .060
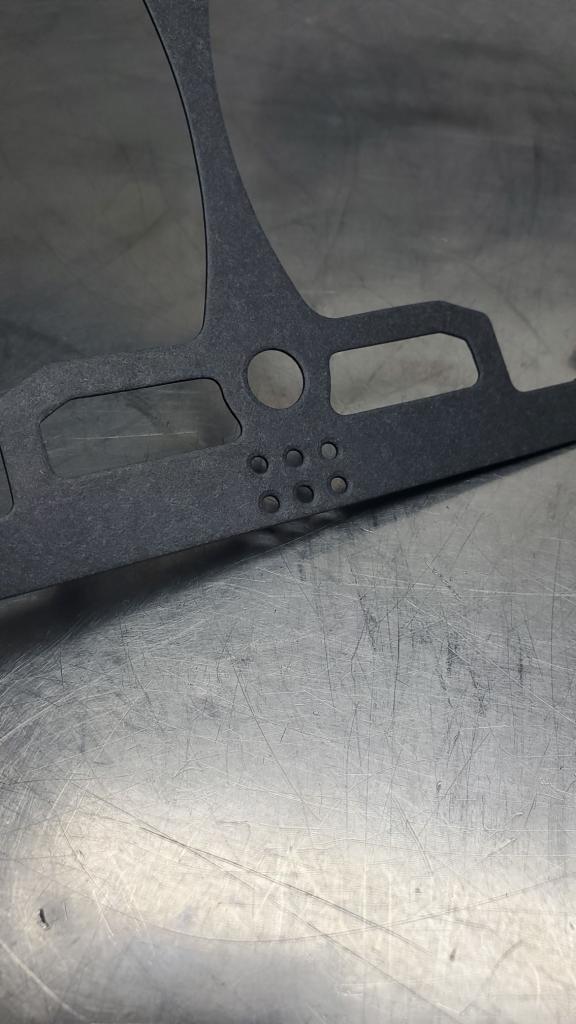
showing the actual measuring of the gasket and you should do the same to help compare your choices once you know what you need to install
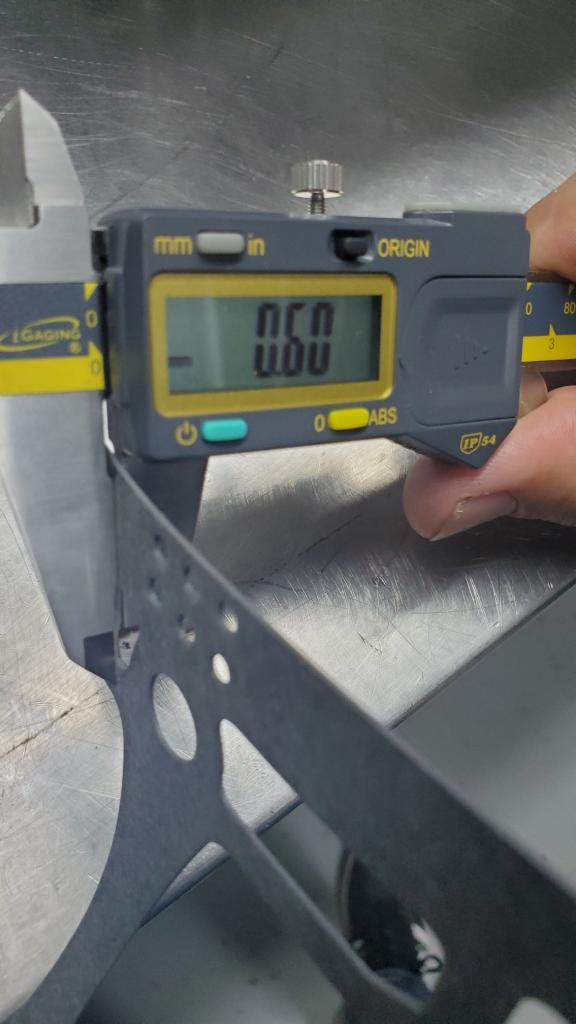
a paper style "7 hole" gasket measurement, note the variance and this is why its a good idea to validate the gasket!
